

Best Tools to Convert Your Business Logo to Embroidery
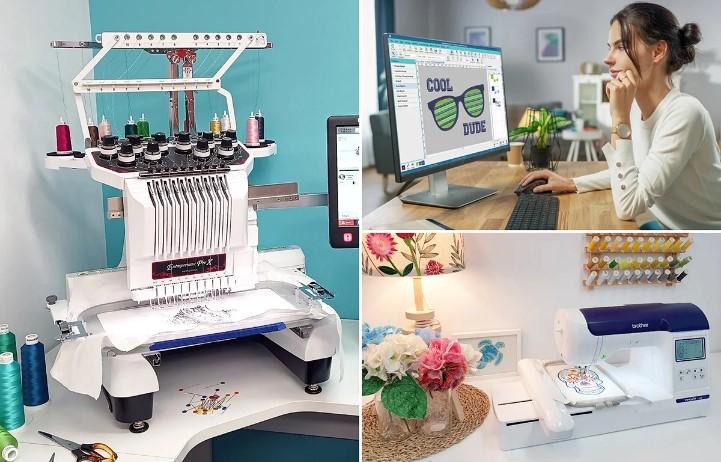
Your business logo is your brand's face. It appears on your website, your business cards, and your storefront. Now you want it on employee uniforms, trade show giveaways, and client gifts. Embroidery adds a level of professionalism that printed logos simply cannot match. But getting that logo from a digital file to a stitched masterpiece requires the right tools. Learning how to convert your business logo to embroidery correctly ensures your brand looks its best on every cap, polo, and jacket.
The challenge is real. A JPG or PNG shows what your logo looks like. An embroidery file contains stitch commands, color information, and machine instructions. Getting from one to the other is not a simple file save. It is digitizing, and the tools you choose determine whether your logo stitches beautifully or becomes a frustrating mess.
Understanding What Your Machine Needs
Before we dive into tools, let us talk about what your embroidery machine actually needs. Different machines use different formats.
Brother and Babylock use PES format.
Janome and Elna use JEF format.
Pfaff and Husqvarna Viking use VP3 for modern machines, PCS for older models.
Bernina uses EXP format with companion INF and BMP files.
Commercial machines use DST format.
Your machine manual lists exactly which formats your specific model accepts. When choosing conversion tools, make sure they support your machine's format.
Why Logo Conversion Is Not a Simple File Save
Here is the honest truth. You cannot just rename a file or use a basic converter and expect quality results. A JPG shows what the design looks like. It has no information about stitch density, underlay, pull compensation, or color sequence .
A properly converted embroidery file has smooth edges, consistent density, proper underlay, logical sequencing, and correct sizing. It has been optimized for your specific fabric and garment type.
When all these elements come together, your logo stitches beautifully. When any are missing, problems appear.
Tool 1: Professional Digitizing Services (Most Recommended)
Here is the honest truth. The best tool to convert your business logo to embroidery is not software at all. It is a professional digitizing service.
Professional digitizers know embroidery inside and out. They understand how stitch flow, underlay, density, and pull compensation work for every fabric type . They carefully plan each stitch direction and sequence, ensuring your logo looks crisp, balanced, and professional on any material.
Services like Absolute Digitizing, Digitizing Buddy, and others employ experienced digitizers who manually create stitch files optimized for your machine.
What you get: You upload your logo in any format (JPG, PNG, PDF, AI). You specify your machine type and desired format. Within hours, you receive a production-ready embroidery file.
Cost: Typically $10 to $15 per design. Rush orders available for small extra fees.
Advantages: No software to buy. No learning curve. Unlimited free edits until satisfied. Money-back guarantee. Files tested before delivery.
Best for: Business owners who need guaranteed quality without investing time in learning digitizing.
For most businesses, this is the smartest path. Your time is valuable. Your brand consistency matters. Paying a small fee for expert results beats spending hours on trial and error.
Tool 2: Wilcom Hatch Embroidery
If you prefer to handle conversions yourself and have the time to learn, Wilcom Hatch Embroidery is one of the best software tools available.
Hatch runs on both Windows and Mac and supports all major machine formats including PES, JEF, VP3, EXP, and DST . It includes auto-digitizing that turns images into stitch files with one click, plus manual tools for refinement.
The 2025 version introduced Multi Blend for blending stitch types and colors across layers . The interface is more approachable than full Wilcom, making it popular among small businesses and serious hobbyists.
Cost: Modular pricing from $199 to $1,799 depending on features.
Learning curve: Moderate to steep. Expect weeks or months to master.
Best for: Small business owners who digitize frequently and want creative control.
Tool 3: Embrilliance
Embrilliance takes a modular approach and runs natively on Mac and Windows. You buy the base platform, then add modules as you need them.
The Essentials platform ($139) includes powerful editing tools. You can merge designs, resize with stitch recalculation, change colors, add lettering, and save to almost any machine format .
The StitchArtist modules add full digitizing capabilities for creating designs from scratch. Font packs expand your lettering options.
Advantages: Pay-as-you-go pricing keeps costs manageable. Native Mac support is rare in embroidery software. Intuitive interface good for beginners.
Best for: Mac users, beginners, and those who want to start small and grow.
Tool 4: Ink/Stitch (Free)
For businesses on a tight budget, Ink/Stitch offers a free path forward. This open-source plugin for Inkscape (also free) lets you digitize images into stitch files .
Ink/Stitch supports over 25 embroidery formats including PES, DST, JEF, and EXP . The 2025 updates continue to improve functionality with new fonts and auto-routing features.
The catch: The learning curve is steep. Inkscape itself takes time to master, and Ink/Stitch requires understanding stitch parameters that paid software handles more automatically .
Best for: Budget-conscious businesses with time to learn. Hobbyists and startups testing the waters.
Tool 5: BERNINA ARTlink 9 (Free)
If you own a Bernina machine, ARTlink 9 is a free gift from the manufacturer. This software lets you edit and convert existing embroidery files to EXP format .
You can resize designs, change colors, combine designs, and preview stitches. It does not digitize from scratch, but it handles format conversion beautifully.
Best for: Bernina owners who need to convert files from other formats.
Tool 6: Brother PE-Design
If you own a Brother machine, PE-Design is the official software. It integrates seamlessly with Brother hardware and includes tools for creating original designs from photos and artwork .
Features include PhotoStitch for converting images to embroidery, Auto Punch for quick digitizing, and over 130 built-in fonts.
Cost: Around $1,600.
Best for: Dedicated Brother users who want the official solution.
Tool 7: Janome Digitizer MBX
For Janome owners, Digitizer MBX is the official software. It works on both PC and Mac, includes auto-digitizing, and supports JEF format .
The software integrates well with Janome machines and includes tools specifically designed for the Janome workflow.
Best for: Janome owners who want official software.
Tool 8: Online Converters (Use with Extreme Caution)
Free online converters are everywhere. You upload your logo, click convert, and download a file in minutes. For extremely simple designs, they might produce a usable file .
But for business logos where quality matters, online converters are risky. They often produce poor density, missing underlay, jagged edges, and arbitrary color reduction . They also raise privacy concerns. Your logo could end up in unknown hands.
Best for: Nothing that matters. Avoid for business use.
What to Look for in Conversion Tools
When evaluating tools, consider these factors:
Format support. Does the tool export your machine's native format?
Quality of results. Does it produce smooth edges, consistent density, and proper underlay?
Learning curve. How much time will you need to invest?
Cost. What is your budget for software versus professional services?
Support. Is there documentation, tutorials, and community help available?
The Cost of Poor Conversion
Let us talk about what bad conversions cost your business.
When you stitch a bad file, you discover problems after investing time and materials. The design puckers. Thread breaks repeatedly. Colors are wrong. You unpick or discard the piece and start over.
One ruined garment can cost more than the price of professional digitizing. One hour of frustration trying to fix a bad file is worth more than the $15 you saved.
Seen this way, professional services are not an expense. They are insurance against waste.
Tips for Working with Any Conversion Tool
Start with the best artwork. Use vector files if possible. If using JPG, make sure it is high resolution with clean lines.
Know your fabric. Different fabrics need different density and underlay. Tell your digitizer or adjust software settings accordingly.
Test on scrap fabric. Never skip this step. Screen previews lie. Only real fabric reveals truth.
Keep notes. Record what works for different fabric types. Build your own reference library.
Which Tool Should You Choose?
Your choice depends on your situation.
If you need guaranteed quality for important business logos, professional digitizing services are your best bet. At $10 to $15 per design, you skip the learning curve and get expert results every time .
If you plan to digitize frequently and have time to learn, Wilcom Hatch or Embrilliance gives you long-term control.
If you are on a tight budget and willing to learn, Ink/Stitch offers a free path forward.
If you own a Bernina and need format conversion, ARTlink 9 is free and official.
If you own a Brother or Janome and want the official solution, PE-Design or Digitizer MBX integrate seamlessly.
Conclusion
Your business logo deserves to look its best on every uniform, cap, and promotional item. The tools you choose to convert that logo to embroidery directly impact the final quality.
Professional digitizing services deliver guaranteed results for a modest fee, making them the best choice for most businesses. Professional software like Hatch and Embrilliance gives you creative control if you have time to learn. Free tools like Ink/Stitch offer a path forward for budget-conscious startups. Official brand software integrates seamlessly with specific machines.
Whichever path you choose, remember the fundamentals. Start with clean artwork. Understand your fabric. Test before production. And never compromise on quality.
Your logo represents everything your business stands for. When you put it on apparel, it speaks for you. Make sure it speaks clearly. Invest in proper conversion, and your embroidered logo will look just as sharp as your printed one, stitch for stitch.