


Aqualyx Injections in Dubai: Your Guide to Fat Reduction
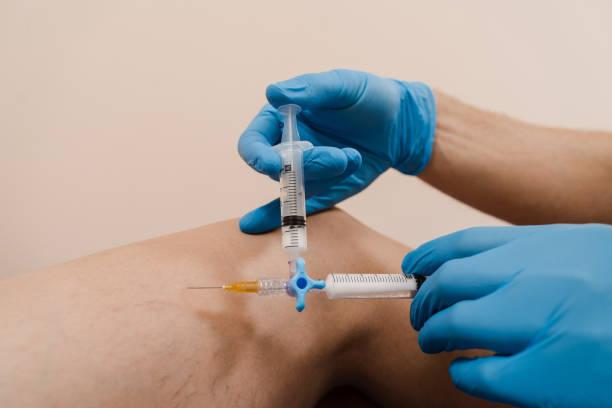
Navigating the world of non-surgical body contouring can feel like learning a new language. You encounter terms like adipocytolysis, lymphatic clearance, and fibrosis, and the sheer volume of information can be overwhelming. This guide to Aqualyx Injections in Dubai for fat reduction is designed to be your comprehensive resource, walking you through every stage of the process from the initial consideration to the final result, in clear, accessible language.
Part One: Determining If You Are a Candidate
Before you book a consultation, there are self-assessment steps you can take to gauge whether this treatment is likely to be appropriate for you.
The Self-Assessment Checklist
Honest self-assessment saves you time and prevents disappointment. Ask yourself the following questions, and answer them truthfully.
Candidate self-assessment questions:
-
Am I at a stable, healthy weight? If your weight fluctuates significantly, address this first. The treatment is for contouring, not weight loss.
-
Can I pinch a discrete pocket of fat? If the area you want treated is diffusely full rather than a defined pocket, you may not be an ideal candidate.
-
Does my skin snap back when I release the pinch? Slow recoil suggests reduced elasticity, which may affect the final contour.
-
Am I willing to look worse before I look better? The swelling phase is real and unavoidable. You must be prepared for this.
-
Can I commit to multiple sessions? Most patients need two to four sessions spaced six to eight weeks apart.
-
Do I have any contraindicated medical conditions? Liver disease, lymphatic disorders, autoimmune conditions, pregnancy, and breastfeeding are contraindications.
-
Am I prepared for the financial investment? The total cost of a treatment series should be understood upfront.
If you answered these questions honestly and the answers align with candidacy, the next step is a professional consultation.
Finding the Right Practitioner
The practitioner you choose is the most important factor in your outcome. Look for a licensed physician with specific training and experience in fat-dissolving injections. During your consultation, assess not just their credentials but their communication style. Do they listen? Do they explain? Do they set realistic expectations? A practitioner who promises dramatic, guaranteed results or who minimizes the recovery process is not being honest with you.
Part Two: The Consultation and Treatment Planning
The consultation is where the treatment plan is developed. It should be thorough, personalized, and unhurried.
What Happens During the Consultation
A comprehensive consultation includes:
-
A full medical history review, including medications, supplements, and any previous aesthetic treatments
-
A physical examination of the treatment area, including the pinch test and assessment of skin elasticity
-
Photographs taken for documentation and treatment planning
-
A discussion of your specific goals and what is realistically achievable
-
An explanation of the treatment process, including the number of sessions likely needed
-
A transparent discussion of the recovery timeline, including the swelling phase
-
A review of potential side effects and rare complications
-
A detailed cost breakdown for the full treatment series
-
An opportunity for you to ask all your questions
You should leave the consultation with a clear understanding of what will happen, when it will happen, and what you need to do to prepare.
Preparing for Your First Session
In the days leading up to your treatment, there are steps you can take to optimize your experience and outcome.
Pre-treatment preparation:
-
Avoid alcohol for 48 hours before treatment to reduce bruising risk
-
Stop any blood-thinning supplements like fish oil, vitamin E, ginkgo biloba, and garlic supplements, with your doctor's approval
-
Stay well-hydrated in the days leading up to treatment
-
Arrange your schedule so you have a few low-key days after treatment
-
Purchase any recommended compression garments in advance
-
Have paracetamol, not ibuprofen or aspirin, on hand for any discomfort
Part Three: The Treatment Day
Knowing exactly what will happen on the day removes anxiety and allows you to arrive calm and prepared.
The Step-by-Step Treatment Process
Step 1: Marking. The practitioner will mark the treatment area on your skin, often with you standing or sitting in a position that makes the fat pocket most visible.
Step 2: Cleansing. The area is cleansed with an antiseptic solution to minimize infection risk.
Step 3: Injection. Using a fine needle or microcannula, the practitioner injects small amounts of the product into the fat pad using a grid or fanning technique. You will feel a burning or stinging sensation that lasts for a few minutes.
Step 4: Completion. The area is gently cleaned, and you are given aftercare instructions verbally and in writing.
Step 5: Departure. You go home. There is no recovery room time, no sedation hangover, and no need for someone to drive you.
Part Four: Recovery and Aftercare
The weeks following treatment are when the real work happens, the work your body does to clear the destroyed fat and remodel the tissue.
Your Aftercare Responsibilities
Essential aftercare measures:
-
Stay upright and avoid lying flat for the first few hours after facial treatment
-
Avoid touching, rubbing, or massaging the treated area for 48 hours
-
Do not apply ice or heat to the area
-
Avoid strenuous exercise for 48 to 72 hours
-
Stay well-hydrated to support lymphatic clearance
-
Walk gently from the day after treatment to stimulate lymph flow
-
Wear compression garments as advised for body areas
-
Avoid anti-inflammatory medications; use paracetamol if needed
-
Avoid alcohol for 48 hours to minimize additional swelling
-
Protect the skin in the treated area from sun exposure
What to Watch For
Mild redness, swelling, tenderness, and firmness are expected. Severe pain, signs of infection such as spreading redness, warmth, or discharge, or any difficulty swallowing or breathing after chin treatment, require immediate medical attention.
Part Five: The Follow-Up and Maintenance
Your treatment journey does not end when the swelling subsides.
The Follow-Up Appointment
A follow-up is typically scheduled six to eight weeks after each session. This allows the practitioner to assess the result, take progress photographs, and plan the next session if needed. It is also your opportunity to discuss any concerns or ask questions about what you are experiencing.
Long-Term Maintenance
Once you have completed your treatment series and achieved your desired result, maintenance is in your hands. Maintaining a stable weight, staying hydrated, and continuing a healthy lifestyle will preserve your result. The fat cells that were destroyed will not return, but the ones that remain can still expand. Your result is a partnership between the treatment you received and the choices you make going forward.

 English
 Arabic
 French
 Spanish
 Portuguese
 Deutsch
 Dutch
Dutch
 Italiano
 Russian
 Romaian
 Portuguese (Brazil)
 Greek
Greek